Posted on

The Content Audit Checklist Every Blogger Should Use

At some point, every blogger looks at their archive and feels a mix of pride and dread. Hundreds of posts, thousands of words, and a sinking suspicion that half of it no longer represents who you are or what you know. That feeling is your signal. It is time for a content audit.

A content audit is not a vanity exercise. It is maintenance. It is the difference between a library and a hoarder’s attic. Done well, it improves your search rankings, sharpens your brand, and shows your readers that you respect their time. Done poorly—or not at all—it lets stale, inaccurate, or off-brand content erode everything you have built.

This is the checklist I use, refined over years of working with blogs that range from solo side projects to publications with millions of monthly readers. Adapt it to your situation, but do not skip the fundamentals.

Step One: Know Why You Are Doing This

Before you open a spreadsheet, define your goal. Are you trying to improve SEO performance? Refresh outdated material? Align your archive with a pivot in your business or voice? Remove content that no longer fits your brand? Each goal changes what you prioritize.

If your primary aim is search traffic, you will focus on metrics like organic clicks, keyword rankings, and backlink profiles. If your aim is brand alignment, you will care more about tone, messaging, and whether a post still sounds like you. If you are preparing for a rebrand or a niche shift, you may be more aggressive about what stays and what goes.Write your goal down. Refer back to it when you hit the inevitable moment of decision fatigue.

Step Two: Inventory Everything

You cannot audit what you cannot see. Start by pulling a complete list of every post, page, and resource on your site. Depending on your platform, this might be an export from your content management system, a crawl with a tool like Screaming Frog, or a manual list if your archive is small.

For each piece of content, collect at least the following: title, URL, publish date, last updated date, author, category, word count, and current traffic data. If you have access to search console data, add organic clicks and average position. If you track conversions, add whatever metric matters to your business—newsletter signups, product sales, affiliate revenue.

This is your master document. Every decision you make will live here.

Step Three: Assess Performance

Now you sort. There is no universal formula, but a useful starting point is to label each post into one of four buckets.

Keep and optimize covers your top performers. These posts drive traffic, rank well, convert readers, or represent your best work. Your job is not to change them fundamentally but to make them better. Update statistics, refresh screenshots, improve internal linking, and ensure the content reflects current best practices.

Keep as-is applies to content that performs adequately and remains accurate, but does not warrant a full rewrite. A how-to guide from two years ago that still ranks on page two and gets steady traffic might fall here. Monitor it, but do not prioritize it.

Update and republish is for content with strong potential but clear decay. Maybe the advice is mostly sound but references tools that no longer exist, or the screenshots show an interface that has since been redesigned. These posts often have existing backlinks or ranking history, which means a refresh can deliver faster results than writing something new. When you republish, change the date, add a note about what was updated, and redistribute it through your usual channels.

Remove or consolidate is the hardest bucket. This is for posts that no longer serve your audience, your brand, or your goals. Thin content that never ranked. Posts about services you no longer offer. Hot takes that aged badly. Announcements for events that happened three years ago. If a post has no traffic, no backlinks, and no strategic value, delete it. If you have multiple short posts on overlapping topics, consider merging them into one comprehensive guide and redirecting the old URLs.

Step Four: Check for Decay

Content decay is real, and it is not always obvious. A post might still get traffic, but if that traffic is declining month over month, it is rotting. Look for posts that once performed well but have dropped in rankings, clicks, or engagement. These are often your biggest opportunities because they already have authority and history. A refresh can restore them faster than building something from scratch.

Also check for broken links, outdated references, and dead embeds. A tutorial that links to a tool that shut down last year is not just unhelpful—it damages your credibility.

Step Five: Evaluate Quality and Fit

Numbers tell part of the story. The rest requires human judgment.

Read your posts, or at least skim them with a critical eye. Does the writing still sound like you? If your voice has matured or your expertise has deepened, early work can feel embarrassing. That is not necessarily a reason to delete it—transparency about growth can build trust—but it might be a reason to update the framing or add a disclaimer.

Check for accuracy. If you write about technology, health, finance, or any field where facts change, stale information is a liability. A post advising readers to use a deprecated API, follow outdated medical guidance, or invest based on old market conditions is worse than no post at all.

ssess strategic alignment. Does this content support your current business model, your current audience, and your current goals? A personal essay that went viral five years ago might be a poor fit for a blog that now focuses on B2B marketing. That does not mean you must delete it, but you should at least understand the trade-off.

Step Six: Fix the Technical Details

Content audits are not just about words. They are also about structure.

Review your internal linking. Are your best posts well-connected to related content? Orphaned pages—posts with no internal links pointing to them—struggle to rank and are hard for readers to discover. Add contextual links where they make sense, and consider creating hub pages or cornerstone content that ties related posts together.

Check your metadata. Titles and descriptions written years ago may not reflect current search behavior or your current positioning. Rewrite them for clarity, relevance, and click-through appeal. Ensure your headings follow a logical hierarchy. Confirm that images have alt text, that load times are reasonable, and that mobile formatting holds up.If you are removing content, handle redirects properly. A deleted post with existing backlinks or traffic should redirect to a relevant replacement, not dump users on your homepage. A mass deletion without redirects creates broken links and frustrates readers who found you through old bookmarks or external references.

Step Seven: Document and Schedule

An audit is not a one-time event. It is a practice. Once you finish this round, set a schedule for the next one. For most blogs, a full audit every twelve to eighteen months is sufficient, with lighter quarterly reviews to catch obvious decay.

Document your decisions. If you removed twenty posts, note why. If you consolidated three guides into one, record the logic. This creates institutional knowledge that helps you avoid repeating mistakes and makes future audits faster.Also document what you learned. Did you notice that your how-to posts from two years ago consistently outrank your opinion pieces? Did you discover that posts over two thousand words perform disproportionately well? These insights should inform your editorial calendar going forward.

Step Eight: Communicate Changes

If your audit involves significant deletion or restructuring, tell your audience. A brief note explaining that you have cleaned up the archive to improve quality and relevance builds trust. It signals that you care about the reader experience more than your ego or your page count.If you republish updated versions of popular posts, promote them as you would new content. Your existing audience may have missed the original, and your refreshed version deserves the same distribution effort.

The Hard Truth

Not every post deserves to live forever. The internet does not need more content. It needs better content. A content audit is your opportunity to choose quality over quantity, relevance over nostalgia, and usefulness over volume.The bloggers who treat their archive as a living asset—something to be maintained, pruned, and improved—are the ones who build lasting authority. The ones who never look back eventually find themselves buried under the weight of everything they have written.

Start your audit this week. Pick one category, one year of archives, or one metric to focus on. Momentum matters more than perfection. Your best work deserves to be found, and your weakest work deserves to be cut loose.

Posted on

Categories vs. Tags: Getting Your Taxonomy Right

If you’ve ever stared at the WordPress sidebar wondering whether to file a post under “Recipes” or tag it “gluten-free,” you’re not alone. The distinction between categories and tags is one of the most misunderstood aspects of content management—and getting it wrong can turn your beautifully organized blog into a digital junk drawer.

The Core Difference: Broad vs. Specific

Think of your content like a library. Categories are the shelves—the big, structural divisions that tell visitors where they are in your world. Tags are the index cards—the specific details that help people find exactly what they’re looking for.

Categories are broad, thematic buckets. They can be nested into parent and child relationships, they are usually required for every post, and you should aim to keep them limited to roughly five to ten total. They often form part of your site’s URL architecture.

Tags, by contrast, are specific and granular. They exist in a flat hierarchy with no nesting, they are optional, and you can have as many as you need. They typically do not affect your URL structure.A food blog might have categories like Breakfast, Dinner, and Dessert. Tags for a specific post might include vegan, 30-minute, one-pot, and meal-prep. The category tells you the room you’re in; the tags tell you the ingredients on the table.When Categories Go Wrong

The most common taxonomy mistake is treating categories like tags. I’ve seen blogs with forty-seven categories, including gems like “Tuesday Thoughts,” “Random,” and “Uncategorized.” Please, delete “Uncategorized.” It is the digital equivalent of a junk drawer labeled “Stuff.”

Categories should be mutually exclusive—or as close to it as possible. A post about a vegan breakfast smoothie should not sit in both Breakfast and Vegan if Vegan is meant to be a dietary tag. If you find yourself creating a category for every detail, you’ve crossed the line into tag territory.

If you have more than ten categories, ask yourself if some are actually tags in disguise. If you have fewer than three, you probably haven’t thought hard enough about your content structure.

When Tags Become Noise

Tags are optional, which means they accumulate like digital dust. A blog with two thousand posts and eight hundred tags isn’t organized—it’s a thesaurus with a search bar.Tag bloat happens when you create slight variations of the same concept: “coffee,” “espresso,” “latte,” “caffeine,” and “morning-brew” all describing the same idea. This fragments your content and creates hundreds of near-empty archive pages that dilute your SEO authority.Before creating a new tag, ask yourself: will I ever write another post with this tag? If the answer is no, skip it. If the answer is yes, check if an existing tag already covers it.

The SEO Angle

Search engines don’t care about your feelings—they care about structure.Categories should reflect your site’s keyword strategy. If you run a tech blog and “Python Tutorials” is a high-value search term, make it a category, not a tag. Category pages often rank well because they aggregate substantial, related content.

Tags are less powerful for SEO but invaluable for internal linking. A well-tagged post creates natural pathways between related content, keeping readers on your site longer. Just don’t let tag archive pages outnumber your actual posts.

A Practical Framework

Here is a decision tree I use with clients.

If a topic is a major theme of your site, it should be a category. If you will write about it regularly—say, ten or more posts—it should also be a category. If it describes a format, tool, or temporary attribute, it is a tag. If it is a sub-topic of an existing category, consider making it a child category or a tag. If you are tempted to make it up on the fly, it is definitely a tag—or nothing at all.

Eeal-World Examples

A photography blog might use categories such as Portraits, Landscapes, Street Photography, Gear Reviews, and Tutorials. Its tags might include Sony A7IV, golden hour, black and white, Lightroom, Iceland, and 35mm.

A SaaS company blog might organize content into Product Updates, Engineering, Customer Stories, and Industry Trends. Tags could cover API, security, onboarding, case study, and Q3-2026.A personal finance site might use Investing, Debt Management, Budgeting, and Retirement as categories. Tags might include 401k, emergency fund, side hustle, Gen Z, and inflation.

Notice how in each case, categories answer “What is this about broadly?” while tags answer “What specific concepts does this touch?”

The Maintenance Problem

Taxonomy isn’t a set-it-and-forget-it system. Every six months, audit your structure.

Merge redundant tags, such as “web-dev” and “webdev.” Delete orphaned tags with zero or one posts. Split categories that have grown too broad—a Tutorials category with two hundred posts might need to become Video Tutorials, Written Guides, and Workshops. Check that your most popular tags actually have enough posts to justify their existence.

The Bottom Line

Categories are your site’s skeleton. Tags are its nervous system—connecting ideas across the structure. You need both, but they serve fundamentally different purposes.

Get your taxonomy right, and readers move through your content effortlessly. Get it wrong, and even your best work gets lost in the noise.

The good news? Unlike a physical library, digital shelves are easy to rearrange. Start simple, stay consistent, and don’t be afraid to reorganize when your content evolves. Your future self—and your readers—will thank you.—What’s your taxonomy strategy? Do you lean heavily on categories, tags, or both? I’d love to hear how you organize your corner of the internet.

Posted on

How to Reorganize an Old Blog Without Losing Traffic

An old blog carries weight. Years of posts accumulate backlinks, build search equity, and attract returning readers who know exactly where to find what they need. Reorganizing such a blog feels risky because every change threatens that accumulated value. A misplaced redirect, a broken URL, a deleted category that still ranks for a valuable term, any of these can erase years of effort in days. Yet doing nothing is equally dangerous. An outdated structure confuses new visitors, buries your best content, and signals to search engines that your site is neglected. The challenge is to modernize without demolishing.

The first step is to understand what you actually have before you change anything. Crawl your entire site and catalog every URL, every backlink, every post that still drives meaningful traffic, and every page that ranks for keywords you care about. This inventory is your baseline. It tells you what is working, what is broken, and what is merely taking up space. Do not skip this step out of impatience. Reorganization without data is renovation without a blueprint. You will knock down load-bearing walls.

With your inventory complete, identify the structural problems. Common issues in old blogs include categories that no longer reflect your current focus, tag systems that have ballooned into uselessness, posts that compete with each other for the same search terms, and navigation menus that grew organically rather than intentionally. List these problems specifically. Vague discomfort with your blog’s organization is not actionable. Knowing that you have fourteen categories for a hundred posts, or that three posts rank inconsistently for the same keyword, gives you targets.

Prioritize your fixes by traffic risk. Pages that drive significant organic visits or hold valuable backlinks should be touched last and most carefully. Pages with little traffic and no external links can be restructured, merged, or removed with minimal consequence. This risk-based approach prevents you from fixing cosmetic issues while accidentally breaking your revenue-generating content. It also helps you sequence the work so that the highest-stakes changes happen when you have the most experience and confidence.

When merging posts, preserve the equity of both originals. Choose the stronger URL as your canonical destination based on backlink profile, traffic history, and click-through rates. Extract the unique value from the weaker post, weave it into a comprehensive revision of the stronger one, and implement a permanent redirect from the old URL. Do not simply delete the weaker post and hope for the best. The redirect passes authority and ensures that anyone following an old link or bookmark lands somewhere useful. Update internal links throughout your site to point to the new consolidated post so that search engines crawl the new structure efficiently.

Category reorganization requires similar care. If you are collapsing multiple categories into a broader structure, ensure that every post has a logical new home. Old category URLs that have accumulated links or traffic should redirect to the most relevant new category or to a tag page that captures the same intent. Do not leave category archives as soft 404s or generic error pages. These pages often rank for long-tail terms that bring steady if modest traffic, and their abrupt disappearance can trigger ranking drops across related content.

Your URL structure itself may need updating, especially if your old blog used dates in permalinks or unwieldy parameter strings. Changing URLs is the highest-risk move in any reorganization because it breaks every existing link to those pages, including backlinks you may not even know about. If you must change URLs, do it comprehensively rather than piecemeal. Map every old URL to its new counterpart, implement server-level redirects, and submit your updated sitemap immediately. Monitor your server logs and search console for 404 errors in the weeks following the change. Catching broken redirects early prevents authority from leaking into the void.

Navigation and internal linking must be rebuilt to reflect your new structure. An old blog often has a navigation menu that grew haphazardly, with links to defunct projects, outdated cornerstone pages, or categories you no longer update. Trim this ruthlessly. Your primary navigation should represent the current state of your blog and the paths you want readers to take. Then walk through your highest-traffic posts and update their internal links to point to the most relevant content in your new architecture. This distributes authority to the pages you want to promote and helps search engines understand the revised hierarchy.

Timing matters. Avoid major structural changes during peak traffic periods, product launches, or algorithm update rollouts when search volatility is already high. Choose a period when you can monitor closely and respond quickly to issues. Communicate changes to your audience if the reorganization affects how they find familiar content. A simple note on your homepage or in your newsletter explaining that you have streamlined your archive and providing a direct contact for feedback reduces frustration and surfaces problems you might have missed.

After implementation, measure relentlessly. Compare your traffic, rankings, and engagement metrics against the baseline you established before starting. Expect some fluctuation in the first few weeks as search engines recrawl and reprocess your site. Persistent drops in specific pages or categories indicate that something went wrong, perhaps a redirect chain, a missed internal link update, or a category archive that no longer serves its original intent. Fix these quickly before the losses compound.

The goal of reorganization is not perfection. It is a structure that serves your current content and your current audience while honoring the history that brought you here. An old blog is not a liability to be erased. It is an asset to be refined. With patience, data, and a bias toward preserving what works while improving what does not, you can transform a cluttered archive into a clean, navigable resource without sacrificing the traffic that makes the effort worthwhile.

Posted on

Site Architecture 101 for Solo Bloggers

Running a blog alone means every decision falls on you. You choose the topics, write the posts, handle the design, and manage the technical backend. When something breaks, you fix it. When growth stalls, you diagnose it. Site architecture is one of those invisible forces that determines whether your blog thrives or struggles, yet it rarely gets the attention it deserves because it is not as visible as a headline or as exciting as a viral post. For a solo blogger, getting architecture right early saves hours of cleanup later and creates a foundation that scales without demanding more of your limited time.

Start with the homepage. This is your front door, and it should tell a new visitor exactly what your blog is about within seconds. Resist the urge to make it a chronological dump of every post you have ever written. A stream of recent articles forces visitors to do the work of figuring out your focus. Instead, lead with a clear statement of purpose, followed by curated sections that guide different types of readers to the content most relevant to them. A new visitor should see your best work first. A returning visitor should find easy paths to your latest updates. The homepage is not a feed. It is a map.

Your navigation menu is the backbone of how readers move through your site. Keep it short and descriptive. Every item should represent a meaningful category of content, not a vague concept or a single post you are particularly proud of. If you find yourself creating a menu item for something you publish once a month, it does not belong in the primary navigation. Secondary navigation, whether in the footer or a sidebar, can handle less frequent destinations like your about page, contact form, or privacy policy. The top menu is prime real estate. Treat it that way.

Categories and tags are where solo bloggers most often create architectural chaos. Categories are broad buckets that describe the major themes of your blog. You should be able to explain what each category covers in a single sentence, and a reader should be able to guess what they will find inside before they click. Tags are more specific descriptors that cut across categories. The mistake most bloggers make is creating too many of both. If you have written twenty posts and have fifteen categories, your taxonomy is too granular. If you have fifty tags and many apply to only one post, you have built a graveyard of empty archive pages. Aim for a small number of well-defined categories and a disciplined approach to tags. When in doubt, leave it out.

URL structure seems technical but shapes how both readers and search engines understand your content. A clean URL includes the domain, the category if it adds clarity, and a readable slug that reflects the post title without unnecessary parameters or dates. Avoid changing URLs after publication unless absolutely necessary, because every change breaks existing links and requires redirects. If you must restructure, do it once and do it right. A solo blogger does not have the bandwidth to manage redirect chains or broken backlinks scattered across years of posts.

Internal linking is where architecture meets content strategy. Every post you publish should connect to at least one older post that deepens the same topic or provides necessary context. This does not mean forcing links where they do not belong. It means thinking about the reader’s journey. Someone reading your post on email marketing for beginners might benefit from your earlier explanation of list building. Someone deep into your advanced automation guide might need a refresher on deliverability basics. These connections keep readers on your site longer, distribute authority across your pages, and signal to search engines that your content is a cohesive body of work rather than isolated articles.

Your archive pages deserve attention because they are often the first impression a curious reader gets of your breadth. A category archive should display posts in a way that highlights your best work, not just your most recent. Consider featuring a standout post at the top, followed by a reverse chronological list. A date archive, if you use one, should be clean and scannable. Many solo bloggers neglect these pages, leaving them as raw lists that do nothing to entice exploration. Your archive is a curated library, not a filing cabinet.

Search functionality matters more as your archive grows. A solo blogger with fifty posts can probably get by without site search. Once you cross a few hundred posts, visitors need a way to find specific content without scrolling through years of archives. If your platform offers search, make sure it returns relevant results and handles common misspellings gracefully. If it does not, consider whether your category and tag structure is tight enough to serve as a manual search alternative.

Mobile experience is not optional. A significant portion of your readers will encounter your blog on a phone, and they will leave if your layout requires pinching, zooming, or waiting for heavy elements to load. Choose a theme or design that prioritizes readability on small screens. Large fonts, generous line spacing, and fast-loading images are not aesthetic preferences. They are architectural requirements for a modern blog. Test your site on an actual phone regularly, not just in a browser simulator.Speed is part of architecture because it affects how every other element performs. A slow site undermines your navigation, frustrates your search, and drives readers away before your content has a chance to persuade them. Compress your images, minimize unnecessary scripts, and choose hosting that can handle your traffic without constant optimization on your part. As a solo blogger, you want your site to be fast by default, not fast because you spent a weekend tweaking configurations.

Finally, plan for growth without overbuilding. Your architecture should accommodate a blog that is ten times larger than it is today, but it does not need to be built for a media company. Do not install complex multi-author workflows when you are the only author. Do not create elaborate content hierarchies for topics you might cover someday. Build what you need now with clean principles that allow for natural expansion. The best architecture is the one you do not have to think about because it simply works.

A well-architected blog feels effortless to navigate. Readers move from post to post without noticing the structure that guides them. Search engines crawl and index your content efficiently. You spend your time writing and promoting rather than fixing broken links or untangling category messes. For a solo blogger, that efficiency is not a luxury. It is the difference between a blog that lasts and one that collapses under its own weight.

Posted on

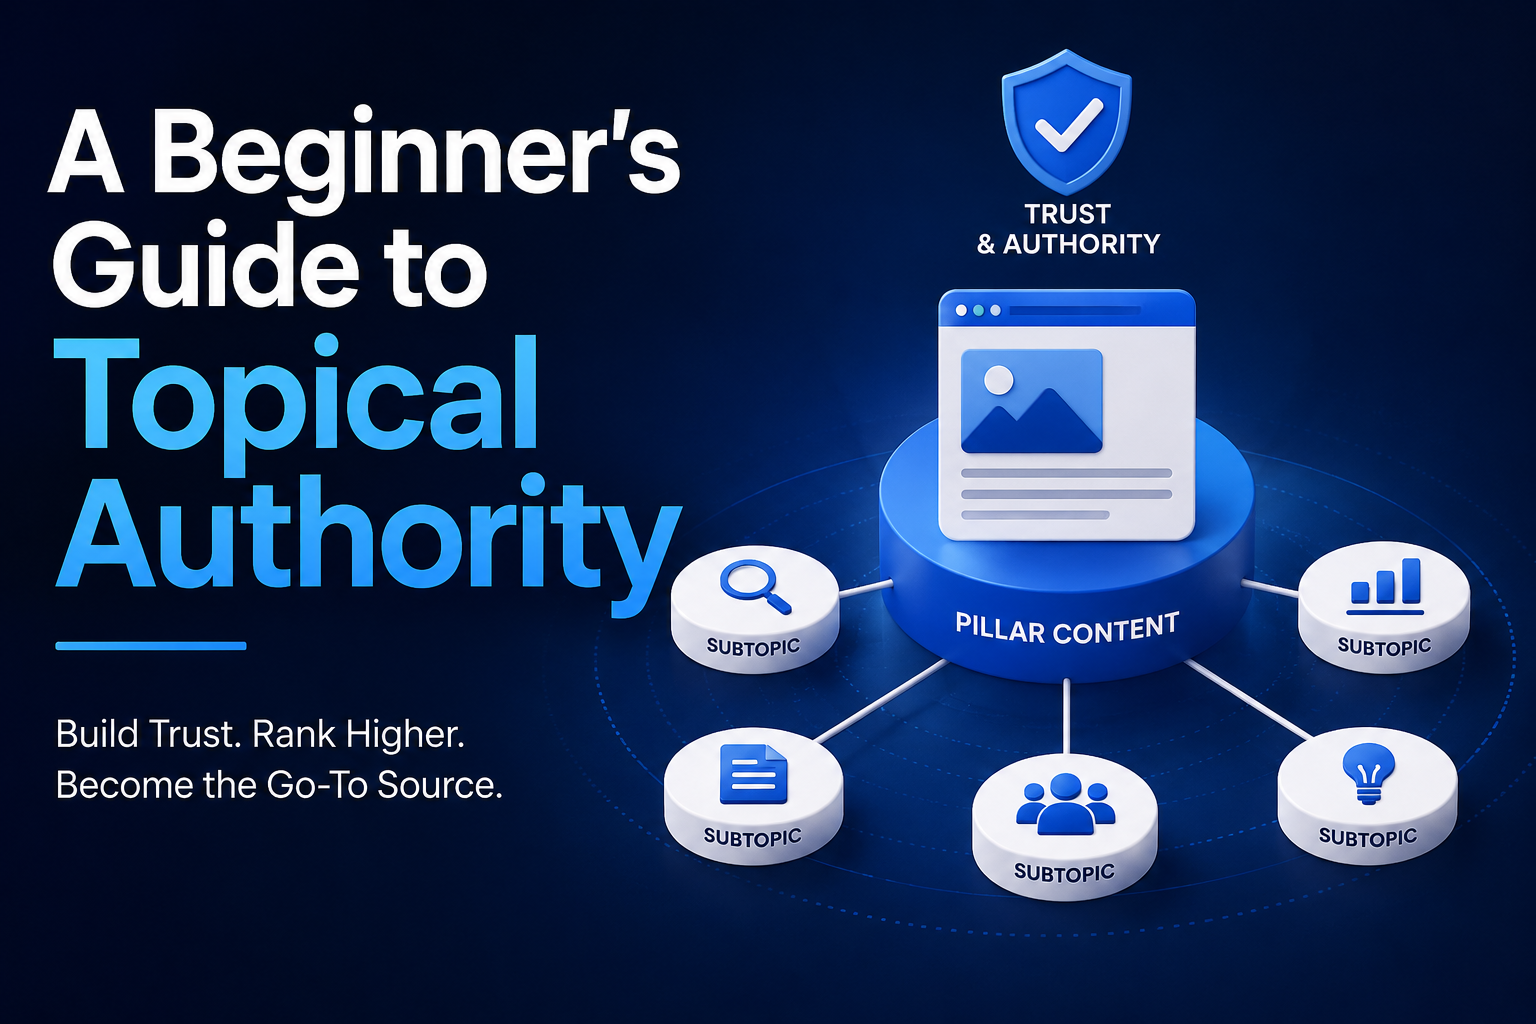
How Many Posts Should Be in a Topic Cluster?

The question sounds simple enough. You have chosen a pillar topic, mapped out the subtopics that orbit it, and now you need to know when to stop. Ten posts? Twenty? Fifty? The honest answer is that there is no universal number, but there are clear principles that guide the count, and they have nothing to do with round figures or industry benchmarks.

A topic cluster exists to solve a reader’s problem completely. The pillar page offers the broad overview, the entry point for someone who needs the landscape before they can navigate it. The cluster posts drill into specifics, each one addressing a distinct question or task that a reader might face after consuming the pillar. The cluster is finished when you have covered every significant question a reasonable person might ask, not when you have hit a predetermined quota. If you can write twenty posts that each serve a unique and necessary purpose, then twenty is your number. If you stretch to fifteen by forcing overlap or manufacturing questions nobody is asking, you have built clutter, not a cluster.

The real constraint is semantic coverage, not volume. Start with the search behavior of your audience. What are they actually typing into search bars? What questions do they bring to support calls? What confuses them in onboarding? Each genuine friction point deserves its own post if the explanation is too detailed for the pillar page and too important to bury in a FAQ section. When your keyword research starts returning variations you have already covered, when the new titles feel like rewordings of old ones, you have reached the natural boundary.

Practical execution matters as much as strategy. A cluster with three posts and a pillar can outperform a cluster with thirty if those three posts are tightly linked, thoroughly answered, and genuinely useful. Early in a content program, depth beats breadth. A small cluster that covers a niche completely establishes authority faster than a sprawling cluster with thin coverage. You can always expand later as new questions emerge, as products evolve, or as search behavior shifts. The cluster should grow organically, not through editorial mandate.

Internal linking reveals whether your cluster is the right size. In a healthy cluster, every post links naturally to the pillar and to the posts that logically precede or follow it in a reader’s journey. If you find yourself struggling to place relevant links, if the connections feel forced, you have probably written past the edges of the topic. Conversely, if your pillar page references concepts you have not yet explained in detail, or if readers consistently bounce from the pillar to search for answers you have not provided, your cluster is too small.

Search engines evaluate clusters by coherence as much as by count. A cluster of eight posts that interlink naturally, share a consistent vocabulary, and cover a topic without redundancy signals expertise. A cluster of forty posts with scattered focus, competing keywords, and weak internal connections signals confusion. The algorithm does not reward effort; it rewards clarity. Every post in your cluster should earn its place by doing something the others cannot.

Consider the lifecycle of the topic itself. Some subjects are static. The fundamentals of double-entry bookkeeping do not change, and a cluster around them has a natural ceiling. Other subjects evolve rapidly. A cluster on artificial intelligence regulation will need continuous expansion as new laws pass and jurisdictions update their frameworks. Your target number is not fixed; it is a function of how dynamic your field is and how committed you are to maintaining currency.

Resource constraints are a legitimate factor, not an excuse. A content team with two writers cannot support a fifty-post cluster without sacrificing quality elsewhere. Better to build a tight cluster of six exceptional posts than a loose cluster of twenty mediocre ones. Quality in a cluster compounds. One weak post drags down the perceived authority of the pillar and its neighbors. One outstanding post elevates the entire group. The number you can support well is the number you should publish.

There is also the matter of competitive positioning. If your competitors have built clusters of twelve posts around a topic, you do not need thirteen to win. You need to identify what they have missed, what they have explained poorly, and what their readers are still searching for after reading their coverage. A cluster of seven posts that fills those gaps precisely will outrank a cluster of fifteen that merely echoes what already exists.

The best clusters feel inevitable to the reader. They move from the pillar to a specific post, then to another, then back to the pillar, each step answering a question they did not know they had until the previous post raised it. This is the experience you are building toward, and it cannot be reverse-engineered from a target number. It emerges from understanding your audience’s journey through a topic and committing to serve every stage of that journey with intention.

So stop asking how many posts belong in a cluster. Start asking how many genuine, distinct, necessary questions your audience has about this topic. Count those. Write to each one with the care it deserves. Link them with the logic of a reader’s curiosity. That is your number. It might be four. It might be forty. What matters is that every post justifies its existence and that together they leave no important question unaddressed.

Posted on

Content Duplication: How to Spot and Merge Overlapping Posts

Every content team eventually faces the same uncomfortable realization: two articles covering nearly identical ground, both ranking for the same keywords, both pulling traffic in different directions, and neither performing as well as a single unified piece could. This is the duplication problem, and it is more common than most marketers care to admit. It happens when teams grow, when editorial calendars stretch across months, and when different writers tackle similar briefs without realizing the overlap. The result is a scattered content ecosystem that confuses search engines, splits your audience, and dilutes the authority you have worked hard to build.

Spotting duplication requires more than a casual read-through. The first sign often appears in your analytics. You notice two URLs competing for the same search terms, with click-through rates that never quite justify their positions. One page might rank on the first page for a week, then slip, while another rises to take its place. Neither stabilizes because search engines struggle to determine which deserves the spotlight. Internally, your team might field support questions that reference two different articles for the same issue, or your sales team might complain that prospects are finding outdated guidance mixed with current recommendations.

Another reliable indicator lives in your site search data. When visitors consistently query terms that should be answered by a single definitive post, yet they bounce between multiple results, you have a duplication issue. The same pattern shows up in your backlink profile. If two similar posts each attract a modest number of links, imagine the concentrated authority of one post gathering all those references. The math is simple but easy to ignore when each post seems to be performing adequately on its own.

Crawling your own site with purpose-built tools can surface overlaps that human review misses. These tools map semantic relationships between pages, flagging clusters where the vocabulary, structure, and intent align too closely. A manual audit complements this by reading pairs of suspected duplicates side by side, asking whether each paragraph adds something the other lacks. If you find yourself copying and pasting sentences from one into the other to make a complete picture, you have found your duplication.

Once identified, the question becomes how to merge without losing what each post has earned. The wrong approach is to simply delete the weaker URL and redirect it to the stronger one. You lose the unique value, the distinct examples, and the specific angles that made the weaker post worth writing in the first place. The right approach is to treat both posts as source material for something better than either alone.

Start by extracting the unique contributions of each piece. One post might have a clearer explanation of a concept, while the other offers a more current case study or a deeper technical walkthrough. Read them as a reader would, noting which sections answer real questions and which merely restate what the other has already said. This extraction phase is tedious but essential. It prevents the merged post from becoming a bloated compilation rather than a refined synthesis.

With your unique elements identified, outline a new structure that flows naturally. The best merged posts do not feel like patchwork. They read as if they were conceived as a single piece from the start. Place the foundational explanation early, follow with the advanced application or case study, and conclude with the practical guidance that ties both together. If one original post had a particularly compelling introduction, adapt it to frame the broader scope of the merged version. If the other had a strong closing argument, elevate it to the conclusion of the new piece.

The technical merge demands equal care. Choose the URL with stronger existing signals, whether that means more backlinks, higher traffic, or better click-through rates. This becomes your canonical destination. The other URL should receive a permanent redirect, but not before you have preserved any comments, internal links, or embedded media worth migrating. Update your internal linking structure so that references to the retired URL point to the new consolidated post. Search engines need time to process these signals, so expect a temporary dip in visibility before the merged post establishes its stronger position.

After publication, monitor the performance of the new page against the combined historical performance of its predecessors. A successful merge should show improved dwell time, lower bounce rates, and gradually climbing rankings for the target keywords. If performance lags, the issue is usually structural. Perhaps the merged post is too long and needs clearer subheadings, or perhaps the synthesis lost the specificity that made one of the original posts valuable to a niche audience. Iteration is part of the process.

The discipline of spotting and merging duplicates extends beyond fixing existing problems. It shapes how you plan future content. Teams that regularly audit for overlap develop a sharper sense of their content architecture. They know which topics they own completely and which still have gaps. They brief writers with reference to existing coverage, preventing duplication before it starts. They treat their content library as a living system that requires consolidation as much as expansion.

In the end, content duplication is not a failure of individual writers or editors. It is an inevitable byproduct of growth and sustained publishing. The teams that excel are not those that never duplicate, but those that catch it early, merge thoughtfully, and build systems that make overlap less likely tomorrow than it was yesterday.

Posted on

Internal Linking Strategy: A Practical Guide for Bloggers

Internal linking is the part of SEO that gets the least attention and offers some of the best return for the effort involved. Unlike backlinks, which depend on someone else deciding your content is worth referencing, internal links are entirely within your control. You decide which pages connect to which, and that decision shapes how both readers and search engines understand what matters on your site.

This post covers how to build an internal linking strategy deliberately, rather than relying on whatever a “related posts” plugin happens to surface.

Why Internal Links Matter as Much as They Do

Search engines rely heavily on links, internal and external, to understand which pages on a site are important and how topics relate to each other. A page that receives many internal links from relevant, well-established pages tends to be treated as more significant than an identical page sitting with no internal links at all, which is really the core problem behind the orphaned posts discussed earlier in this series.

Readers respond to internal links too, just for more obvious reasons. A well-placed link that answers a natural follow-up question keeps someone reading your site instead of bouncing back to search results. Multiply that across a whole blog, and the difference between a site with a deliberate linking structure and one without shows up clearly in pages-per-session and average time on site, both of which correlate with better long-term rankings.

Linking With Intent, Not Obligation

The most common failure in internal linking isn’t linking too little, it’s linking without a reason. A link dropped into a paragraph because a plugin suggested it, or because a writer felt obligated to reference an old post, tends to read as exactly what it is — an interruption rather than a genuine next step for the reader.

A better standard is to ask whether the sentence containing the link would still make sense and still be useful if the link were removed. If a link only exists because you wanted to link somewhere, and the surrounding sentence is otherwise empty of meaning, that’s a sign the link is serving the site’s structure at the expense of the reader, rather than serving both at once.

Anchor Text That Actually Describes the Destination

Anchor text — the clickable words themselves — carries meaning for both readers and search engines, and vague anchor text wastes that signal. Linking the words “click here” or “this post” tells a reader almost nothing about what they’ll find on the other side, and tells a search engine even less about the topic of the destination page.

Descriptive anchor text that reflects the actual topic of the linked page, worked naturally into the sentence, does double duty: it sets accurate reader expectations and reinforces topical relevance for the page being linked to. This matters enough that it’s worth a quick pass over old posts specifically to fix generic anchor text, even without touching anything else about the post.

How Deep Should Links Go

A useful mental model is to think of your site’s pages arranged in a hierarchy going from broad to narrow — homepage, then pillar pages, then cluster posts, then perhaps very narrow supporting notes underneath those. Links should flow generously in both directions between adjacent levels of that hierarchy: pillar pages linking down into their cluster posts, and cluster posts linking back up to their pillar, as covered in the pillar page guide earlier in this series.

Links that skip levels — a narrow cluster post linking directly to another unrelated narrow post several clusters away — are fine occasionally when genuinely relevant, but shouldn’t be the backbone of your linking strategy. The backbone should be the pillar-to-cluster relationship, since that’s what gives search engines the clearest signal about how your content is organized by topic.

Auditing Your Existing Links

If you’ve already gone through the content audit covered earlier in this series, you likely have a rough map of which posts belong to which topic groups. The next step is going through that map and checking, post by post, whether the links that should exist actually do.

This is slower going than it sounds, because it requires actually reading each post to find natural linking opportunities rather than just checking a box that says “this post links somewhere.” A post might technically contain three internal links and still be poorly linked, if all three point to unrelated tangents rather than the genuinely relevant posts sitting right next to it in the same cluster. Reading every post in a cluster with an eye specifically toward missing or weak links is exactly the kind of pattern-matching task that becomes tedious past a few dozen posts and is well suited to being done automatically at scale, even though the actual decision of where a link belongs still benefits from a quick human sanity check.

Fixing Old Posts Without Rewriting Them

A useful habit is treating internal linking as something you can improve without touching the rest of a post. Going back through an old article purely to add two or three well-placed links, without otherwise editing it, is a low-risk, high-value task, since it doesn’t disturb whatever is already working about the post while still improving its position in your site’s overall structure.

This is also a good use of time immediately after publishing something new. A freshly published post has no incoming links yet by definition, so the first task after hitting publish should be going to two or three related older posts and adding a link into the new one, rather than waiting for a future audit to notice the gap.

Navigation and Non-Contextual Links

Everything above concerns links inside the body of an article, sometimes called contextual links, which tend to carry the most weight because they’re chosen deliberately rather than generated automatically. Navigation menus, footer links, and “related posts” widgets matter too, but they carry less individual weight per link since they appear identically across many pages rather than being chosen for a specific piece of content.

That doesn’t make them worthless. A well-curated “related posts” section that actually reflects genuine topical relationship, rather than just the most recent five posts regardless of subject, still helps readers and still reinforces cluster structure. It just shouldn’t be treated as a substitute for deliberate contextual linking within the article itself.

A Simple Standard to Hold Every New Post To

Before publishing anything new, a workable minimum standard is that the post links up to its relevant pillar page, links across to at least one or two genuinely related cluster posts, and receives at least one link back from an existing post shortly after publication, rather than being left to sit as an orphan until some future audit catches it. Holding every new post to that standard from the start prevents most of the linking problems this series has covered from ever accumulating in the first place.

The next post in this series looks at a related but distinct problem: what happens when multiple posts end up covering nearly the same ground, and how to tell the difference between healthy topical depth and genuine content duplication worth merging.

Posted on

How to Build a Pillar Page That Actually Rank

sA lot of bloggers hear “pillar page” and picture something like a glorified table of contents — a long post that links out to a bunch of other posts and not much else. That’s part of what a pillar page does, but it’s not what makes one actually rank. A pillar page that works is a genuinely comprehensive, standalone resource on its topic, one that would be useful even to a reader who never clicks a single internal link. The linking structure is the bonus, not the substance.

This post covers what separates a pillar page that ranks from one that just sits there being a directory nobody reads.

What a Pillar Page Needs to Do

A pillar page has two jobs at once, and most weak pillar pages only do one of them. The first job is to be the best single answer to the broad topic it covers, comprehensive enough that a reader who lands on it and reads nothing else still walks away satisfied. The second job is to organize and link out to every relevant supporting post in its cluster, so that both readers and search engines can see the full depth of coverage your site has on the subject.If you only do the first job, you end up with a great standalone article that isn’t connected to anything, which is really just an orphan candidate with better writing. If you only do the second job, you end up with a thin hub page that reads like a list of links wearing a headline — comprehensive in structure but empty in substance, which readers bounce from immediately and Google doesn’t reward.

Choosing the Right Topic Scope

Before writing anything, get the scope right. Too broad, and the page can’t possibly be comprehensive without ballooning into something unreadable — “how to blog” is too broad for almost any niche site to own credibly. Too narrow, and there’s no room for a real cluster underneath it — “how to brew coffee in a French press with 2:1 ratio” is really a cluster post pretending to be a pillar.

A workable test is whether the topic naturally supports somewhere between five and twelve distinct, non-overlapping supporting posts, each answering a specific sub-question a reader would have after reading the pillar. If you can’t list at least five, the topic is probably too narrow for its own pillar. If you’re listing twenty and they don’t feel related to each other, it’s probably two or three pillar topics being treated as one.

Structuring the Page Itself

A pillar page that ranks well tends to follow a predictable shape, even though the specific content varies by niche. It opens by clearly stating what the page covers and who it’s for, so a reader (and a search engine parsing the page) immediately understands its scope. It then works through the topic in a logical order, using clear H2 and H3 headers that mirror the actual subtopics a reader cares about, rather than headers written to stuff in keywords.

Each major section should say enough on its own to be genuinely useful, then link out to the relevant cluster post for anyone who wants to go deeper. The link should feel like a natural next step, not an interruption — something closer to “the mechanics of choosing a grind size are covered in more depth here” than a bare “read more” button dropped at the end of a paragraph.

Near the end, a well-built pillar page often includes a short section that ties the whole topic together and points toward related pillars if the site has them, giving both readers and search engines a sense of how this pillar fits into the broader site.

Writing for Comprehensiveness Without Padding

The instinct to hit a big word count on a pillar page sometimes leads to padding — restating the same point three different ways to look thorough. That backfires. Comprehensiveness means covering every subtopic a reasonable reader would want addressed, not repeating yourself to inflate length. It’s entirely possible to write a genuinely comprehensive 2,500-word pillar page and a padded, repetitive 4,000-word one on the same topic, and the shorter one will usually perform better, because readers and search engines both register when a page respects their time.

A useful habit while drafting is to imagine the ten most common follow-up questions a curious reader would ask after your opening section, and make sure each one is addressed somewhere in the page, even briefly, with a link to the fuller treatment in a cluster post where one exists.

Linking the Cluster In

Once the supporting posts exist, or as you plan them, the pillar page’s internal links matter as much as its prose. Every relevant cluster post should be linked from the pillar at the point in the page where that subtopic is first introduced, not bundled into a generic list at the very bottom. A reader scanning the “grind size” section should find the deep-dive link right there, in context, rather than having to hunt for it in a separate “further reading” block.

The reverse direction matters just as much. Every cluster post should link back up to the pillar, usually early in the post, so that both readers and search engines can trace the relationship in both directions. A pillar page that links out beautifully but receives no links back from its own cluster posts is only doing half the job.

Common Mistakes That Keep Pillar Pages From Ranking

The most frequent mistake is publishing the pillar page before any of its cluster posts exist, then never coming back to add the links once they’re written. The page ends up permanently underlinked, and the whole point of a pillar structure — mutual reinforcement between hub and supporting content — never actually happens.

Another common mistake is treating the pillar page as a one-time project rather than something that gets revisited. Topics evolve, new subtopics emerge, and a pillar page written two years ago often needs a pass to fold in newer supporting posts and updated information, the same way any decayed content does.

A third mistake is choosing a pillar candidate based on which post happens to be the longest, rather than which one is actually the best foundation for the topic. Length alone doesn’t make a post a good hub — a shorter, well-organized post with a clear structure is often a better pillar candidate than a long, rambling one that happens to have more words.

Updating an Existing Post Into a Pillar

You often don’t need to write a pillar page from scratch. If your content audit surfaced a post that’s already broad, already performing reasonably well, and already roughly in the right shape, upgrading it into a proper pillar is usually faster and more effective than starting over. That means expanding thin sections, adding the subtopic headers your cluster actually needs, and going through and adding links to every relevant supporting post you have or plan to write.

This approach also tends to preserve whatever ranking signal the original post had already built up, rather than starting a brand-new URL from zero.

Measuring Whether It’s Working

A pillar page that’s doing its job shows a few consistent signs over time. Search Console impressions for a wide range of related queries tend to climb, since a genuinely comprehensive page naturally surfaces for many different phrasings of the topic rather than just one exact keyword. Time on page and pages-per-session for visitors landing on the pillar tend to be noticeably higher than for a typical single post, since readers are moving between the pillar and its cluster posts rather than reading one page and leaving. And the supporting cluster posts themselves often see a lift in their own rankings over the following months, since they’re now benefiting from a stronger, better-linked hub pointing to them.

None of these show up overnight. A pillar structure is closer to a foundation you build once and maintain than a quick win, which is exactly why it’s worth getting the structure right from the start rather than publishing something thin and circling back later.

The next post in this series looks at the reverse question — once a pillar and its cluster exist, how many supporting posts is actually enough, and when adding more starts to hurt rather than help.

Posted on

Finding and Fixing Orphaned Blog Posts

An orphaned post is a page on your blog that no other page links to. It exists, it’s indexed, maybe it even ranks a little — but nothing on your own site points to it. No reader will ever stumble onto it by browsing. No internal link is passing it any authority. As far as your site’s own structure is concerned, it might as well not exist.If you ran the content audit from the previous post in this series, you’ve probably already flagged a few. This post covers how to find the rest, why they’re worth fixing, and exactly how to fix them.

Why Orphaned Posts Happen

Nobody sets out to create orphans. They accumulate for boring, structural reasons. Sometimes a post was published before the topic had a cluster, and nobody went back to link it in once the cluster existed. Sometimes a “related posts” plugin was disabled or changed, silently removing the only links a post ever had. Sometimes a category or tag page was restructured, and posts that used to be reachable through that navigation path no longer are. Sometimes a post was written as a one-off — a tangent, a reaction to news, a personal update — with no natural home in any cluster. And sometimes old posts simply get buried under new content in a purely chronological blog feed, with nothing else surfacing them.

None of these are content problems. They’re linking problems. And linking problems are usually much faster to fix than the alternative — rewriting or deleting the post.

Why Orphans Hurt More Than People Think

It’s tempting to assume an orphaned post that still gets a trickle of search traffic is “fine.” It’s live, it’s indexed, people occasionally land on it. What’s the harm?The harm is in what it’s not doing. It’s not passing or receiving internal link authority — Google’s crawlers rely heavily on internal links to understand which pages on your site matter most, and a page with zero internal links pointing to it is signaling, even if accidentally, that even you don’t think it’s important enough to reference. It’s also a dead end for readers: someone who lands on an orphan from a search result has no path deeper into your site, so they read one page and leave, which is a wasted visit that a properly linked post would have turned into two, three, or more page views. It can’t benefit from a stronger pillar page’s authority either — if a related pillar page is ranking well, an orphan in the same topic area should be getting some benefit from a link off that pillar, but without the link it gets nothing. And an isolated orphan often signals under-coverage of a topic from Google’s perspective. If your site has one isolated post on a subject and no supporting structure around it, that reads as thin coverage, even if the post itself is well written.

How to Find Every Orphan on Your Site

There are three practical ways to do this, in increasing order of thoroughness.The simplest is a manual search-operator check. For any post you suspect might be orphaned, search site:yoursite.com “exact post title” alongside a search for the URL itself. If you can’t find any other page on your own site referencing it, and you know the site well enough to be confident, it’s likely an orphan. This works fine for spot-checking a handful of posts but doesn’t scale.

A more thorough approach is to crawl your own site. Free tools like Screaming Frog (free up to 500 URLs) will crawl your site and show you the internal link count for every page. Sort by “Inlinks” ascending, and anything at zero is a confirmed orphan. This is the most reliable manual method for blogs under a few hundred posts.

The most thorough approach is to cross-reference your CMS content against your crawl. Sometimes a post technically has one inbound link, but it’s from an equally obscure or orphaned page, meaning it’s still functionally unreachable from anywhere a real reader would browse. A thorough check cross-references crawl data against your actual navigation, category pages, and recent “related posts” widgets to confirm a link is genuinely reachable, not just technically present. This is the step most manual audits skip, and it’s exactly the kind of check that’s tedious by hand but mechanical enough to automate reliably once you’re past a hundred or so posts.

Fixing an Orphan: Four Options

Once you’ve found one, you have four real options. Which one applies depends on the quality and relevance of the post itself.The first option is to link it into an existing cluster. If the orphan fits a topic you already cover elsewhere, this is the easiest fix. Go to two or three related posts, or the pillar page for that cluster, and add a contextual link to the orphan where it naturally fits — not a bolted-on “you might also like” line, but a real sentence that would read fine even without the link.

The second option is to build a new cluster around it. If the orphan is genuinely good content but has no siblings yet, it might be the seed of a future cluster rather than a problem to patch. Treat it as a pillar-page candidate and plan supporting posts around it, using the process from building a cluster from scratch.

The third option is to merge it into a stronger post. If the orphan overlaps heavily with a post that’s already performing better, don’t just link them — merge them. Fold any unique value from the orphan into the stronger post, then 301 redirect the orphan’s URL to it. This consolidates whatever ranking signal both pages had into one stronger page, rather than splitting it.

The fourth option is to retire it. Not every orphan deserves to be saved. If a post is outdated, off-topic for your current blog direction, or was never good in the first place, it’s fine to redirect it to a relevant hub page or let it go. Not every old post needs to be rescued — sometimes the honest fix is fewer pages, not more links.

A Simple Triage Framework

When you’re not sure which of the four options applies, work through three questions in order. First, is this post still accurate and worth reading today? If not, retire or heavily rewrite it. Second, does a similar, stronger post already exist? If so, merge and redirect. Third, does it fit a topic cluster, existing or future? If so, link it in or build around it. If the answer to all three is no, it’s a genuine candidate for retirement.

Preventing New Orphans Going Forward

The best fix is not creating new ones in the first place, and two habits prevent most future orphans. The first is linking new posts into an existing cluster at publish time, not later — when you write a new post, immediately add it to the relevant pillar page and link it from at least two related posts before you hit publish. The second is revisiting your linking structure whenever you restructure navigation, categories, or a “related posts” plugin. These structural changes are the single most common cause of previously-linked posts suddenly becoming orphans, and they’re easy to miss because the post itself never changed — only what points to it did.

The Bigger Picture

Fixing orphans individually is a fine use of an afternoon. But orphaned posts are really a symptom of the same underlying issue covered throughout this series: content published without a deliberate structure behind it. Once your blog is organized into proper content clusters with a clear pillar page at the center of each one, orphans become much rarer, because every new post has an obvious home before you even finish writing it.

If you’re staring down a few hundred posts and dreading the crawl-and-cross-reference process described above, that dread is reasonable. It’s the single most tedious part of a content audit, and also the part most amenable to being done automatically once you’re past the point where doing it by hand is a good use of your time.

Posted on

How to Audit Your Blog’s Existing Content in One Afternoon

Most bloggers avoid content audits because the word “audit” sounds like a multi-week project involving spreadsheets, consultants, and a headache. It doesn’t have to be. For most blogs under a couple hundred posts, a useful first-pass audit takes an afternoon — not because you’re doing it sloppily, but because the goal of a first audit isn’t perfection. It’s visibility.This post walks through exactly how to do that first pass: what to look at, what to record, and what decisions to make once you can see your whole blog laid out in front of you.

Why Bother Auditing at All

If you’ve been publishing for a while without a deliberate structure, you likely have posts that overlap, posts nobody links to, and posts that used to rank and quietly stopped. None of that is visible from inside the WordPress dashboard, where posts are just a flat list sorted by date. An audit turns that flat list into a map — which is the prerequisite for building the content clusters discussed in the previous post in this series.You can’t fix what you can’t see. That’s really the whole case for doing this.

What You’ll Need

A spreadsheet (Google Sheets or Excel is fine)Access to your site’s analytics (Google Search Console is the most useful single source)An hour or two of uninterrupted timeEvery published URL on your blogThat’s it. You don’t need paid tools for a first pass.

Step 1: Pull a Full List of URLsExport every blog post URL you have. If your site has a sitemap.xml, that’s the fastest source — most platforms generate one automatically at yoursite.com/sitemap.xml or yoursite.com/post-sitemap.xml. Paste the list into your spreadsheet, one URL per row.

If you don’t have a sitemap, your CMS’s post list (sorted by date, exported or copy-pasted) works fine too.

Step 2: Add the Basic Columns

For each post, record:TitleURLPublish datePrimary topic (your own best guess, one or two words)Word count (rough estimate is fine)Last updated (if different from publish date)This is tedious but mechanical — you’re not making judgment calls yet, just recording facts.

Step 3: Pull in Performance DataOpen Google Search Console and export the Pages report for the last 12 months. Match it against your spreadsheet by URL and add two more columns:Clicks (last 12 months)Average positionThis step turns your audit from a content list into a performance map. Posts with high average position but low clicks might have a title or meta description problem. Posts with neither clicks nor decent position are candidates for a rewrite, a merge, or retirement.

Step 4: Group by TopicNow the actual audit work begins. Sort your spreadsheet by the “Primary topic” column and look at what clusters naturally. You’re looking for two things:

Groups of 4+ posts that clearly belong together — these are your candidate content clusters

Singletons — posts with no obvious siblings, which either need a cluster built around them eventually, or don’t deserve one and should be evaluated on their own merits

Don’t worry about perfect categorization here. The goal is a rough map, not a taxonomy PhD.

Step 5: Flag the ProblemsAs you go through each group, tag posts with one of these flags:Orphan — no internal links point to this post from anywhere else on the site (check this using a “site:yoursite.com [exact title]” search, or a crawler if you have one)

Overlap — two or more posts in the group are targeting essentially the same keyword or question

Decayed — a post that used to rank well (check older Search Console data if available) but has dropped significantlyThin — under 500 words, unlikely to be comprehensive enough to be useful as-is

These four flags are the ones worth tracking first. You can add more later, but these four alone will tell you 80% of what’s wrong with an unaudited blog.

Step 6: Make the Calls

With everything tagged, go group by group and make three decisions per cluster:

Which post is the pillar candidate? Usually the longest, broadest, or best-performing post in the group.Which posts need to be merged? Overlapping posts targeting the same query should usually become one stronger post, with the weaker one redirected.

Which posts need new internal links? Any orphan that fits a group gets added to your linking to-do list.

You now have a working map: pillar candidates, cluster members, merge targets, and a linking backlog. That’s a real content strategy, built in an afternoon, from information you already had sitting in your dashboard and Search Console.

What This Looks Like at Scale

This process works cleanly up to maybe 40–60 posts. Past that, the manual grouping step (Step 4) starts to break down — not because the method is wrong, but because human pattern-matching gets slower and less consistent the more rows you’re staring at. Bloggers with a couple hundred posts often quit the audit around this point, not because it stopped being valuable, but because it stopped being fast.

This is the part of the process most worth automating: reading every post’s content (not just its title), grouping by actual topical similarity rather than a guessed keyword, and flagging orphans and overlaps algorithmically instead of by eye. The judgment calls in Step 6 — which post becomes the pillar, what gets merged — still benefit from a human decision. But the grouping and flagging in Steps 4 and 5 are exactly the kind of repetitive classification work that doesn’t need to be done by hand past a certain blog size.

What to Do With the Results

Once you’ve got your map, the next posts in this series cover each fix directly: finding and repairing orphaned posts, building a proper pillar page, and deciding how many posts belong in a cluster. Treat this audit as the diagnostic step — everything downstream depends on having gone through it honestly, even if the results are a little embarrassing the first time you see your blog laid out end to end.

Most bloggers who do this for the first time find at least a handful of posts they’d completely forgotten existed. That’s normal, and it’s exactly the problem an audit is meant to surface.